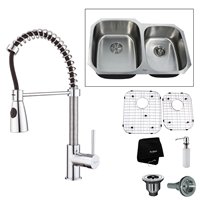
Most of us, if we are asked to do a thing that we are not familiar with, we will readily balk at the task. This is especially true with installing a kitchen sink.
We would rather give the job to an experienced plumber. What if you are short of funds and you need it done right away? Your apprehensions are perfectly understandable. If you really don’t know the basics of kitchen sink installation, you might think that it is a very formidable task. But once you acquire just a working knowledge of how it is done, you will be more confident of doing it yourself.
Whether you have the funds to pay for a plumber or there is no other way but to do it yourself, you need to know how kitchen sink installation is done. If you finally decide to give it to a plumber, you can check if he is doing it right or not. You still get the benefits of knowing how to do it and you can check if the job is done correctly. To help you get a better grasp on this subject, here are some of the basic things that is required in order to effect a good kitchen sink installation – one that will eventually function well.
Materials You Will Need Preparatory To The Actual Installation
Before you start installing your sink, you need to prepare these items. You will need them as you proceed with the installation.
-
The sink assembly, including the faucet and strainer
-
P-trap
-
Tape measure
-
Electric Drill
-
Jig-saw or saber saw
-
Adhesive Tape
-
Marker
-
Flexible supply tubing
-
Plumber’s putty
Process Of Installing The Kitchen Sink
As mentioned before, even if you will not install the sink yourself, it is good to know the procedure on how it is done so you’ll be able to know if it is done correctly or not. Here is the basic procedure of kitchen sink installation.
- Before even buying the countertop, the first thing you need to do is to measure the surrounding space below the countertop, specifically the width. This will help you choose the right size of sink that will fit this space and save you a lot of trouble in adjusting sizes here and there. To give you an idea, a sink that is 22 inches wide is just right for a countertop width of 24 inches. If there is a backsplash, you can get a sink with a 20 to 20 ½ inch width.
- Assuming you already have the right sized sink, the next thing to do is to use the template that is supplied when you bought the sink. Place this template at the designated opening (provided for the sink) at the countertop. Locate it so that there is at least 1.5 to 2 inches space between its edge and the front edge of the countertop. See that it is centered on the sink cabinet. Then tape the template and mark its outline, then remove the template. You should clearly see the sink outline on the countertop.
- Now get the electric drill and start drilling 3/8 inch holes on the four corner holes of the sinks as indicated by the outline. Then connect the holes with the marker pen. You have to cut open this portion of the countertop. Use a saber or jig-saw for this purpose starting with one of the holes and moving from this hole to the next following the marker line until you have completed the four corners. Remove this cut-out portion and you now have the opening for your sink.
- Next step is to install the small parts connected to the sink such as the faucet or the sprayer. Consult the installation instructions that are provided with these fixtures when you bought them. Then attach the sink strainer in the kitchen sink strainer hole.
- You are now ready to install the kitchen sink. Put the sink upside down and apply plumber’s putty over all its edges. Flip the sink over place it over the sink opening at the countertop. Plumbers usually fixed the sink in its place by using clips on the underside to pull the sink tightly downwards. It will also ensure that there are no open spaces between the sink and the countertop. The sink is now screwed down to the countertop to fix its place.
- Next is the connection of the sink to the plumbing underneath the countertop. Locate the drain pipe and connect the P-trap. Then connect the flexible supply tubing to the hot and cold water supply lines. Next, connect the strainer to the drain pipe. If there is an aerator in the faucet, remove it, and then turn the water on for about 2 to 3 minutes. After this, re-connect the aerator to the faucet. Your sink is now ready for use.
This is the basic procedure that plumbers follow in installing kitchen sinks. There may be some small variations here and there but the general outline is the same. Knowing this, you can now see whether you are up to the job or not.
